Playing with paint

Playing with paint
abstract art

07 December 2012

Patterns and more patterns

Just thought I would squeeze in this last blog post before I go away.  Spent the day yesterday, (in between playing with the Gimp programme) on housework, so everything is squeaky clean and fresh in readiness for my departure.
 
We are up to week 5 of the Gimp classes, can't believe there is only one week  left.  I wont be able to do the last one until I return, so I will have to fill my time with other things, like perhaps stitching.

Wish I were 50 years younger, I know I would not choose shorthand and typing for a career.  I am sure I could have gone into graphics and textile design. I know one thing for sure I would have mixed with a lot more interesting people than the boring old politicians and solicitors who I worked for in those days.

pattern from using the magic wand on the petals to create the design
random patterns
This week the lessons were based on patterns.   We could download them, or make our own which is what Sharon taught us.   Patterns.....I have patterns coming out of my ears. But have had so much fun.  I am just going to put the before and after photos up. No room to go into the details here.

Here are some more collages of the patterns I have made.

Different patterns by altering the silk ribbon embroidery

Patterns from the original two black and white brushes
This pattern was made from tiny circles which I then "made seamless" It appears to be a tiny checkered pattern.

Patterns from part of the photo of the ranuculas
The Toowoomba Quilters  had their xmas party last week, and each year have a secret santa.  This year, although I was unable to go due to being struck down with the dreaded lurgi, I did make this little bag, which I filled with some goodies for the new owner.  

In return I received a lovely gift of some beautiful stationery embossed with quilt designs, a hand towel and some scented soaps.  No photos though, the camera is packed.

Till the New Year in 2013.

02 December 2012

Week 4 Gimp and Christmas wishes


Week 4 of the workshop turned out to be really interesting and a lot of fun once more.   I wish I had been able to do this class when I first became interested in this programme. The pictures in the collage above could be a good way of making zentangles or has this idea already been thought of.

This week we began with the drawing tools, brush, pencil, paintbrush, airbrush, paint bucket, eraser (yessssss!!!!) and Ink.   Some I liked better than others.  The airbrush did not seem to grab me, but maybe in the right situation it could be different.   Looooved the brushes and working with gradients.   Everything is so much more interesting when you are taught correctly.

Sharon Boggon is the brilliant mind behind this course and if anyone is interested go to Sharons page and investigate where you can put your name down for one of her courses.

Now I have learned to make "brushes" properly, and I must add here it does pay to read EVERY word in the instructions.....I am loving them.

When working with the previous lessons, my brain tended to work towards painting pictures, but after this lesson I think I have begun to now lean towards texture design.    There is so much scope .....not that I am young enough to go into that field, but it is fun to do.


So here are more pictures of this week's efforts. Not quite in the right order, but hopefully if you click on the picture it will enlarge.

Now I guess everyone is wondering how I was able to get all the photos together in one area.  Here is a link to a site with the instructions on how to make a collage in the Gimp programme.  There are more choices if you google collage from Gimp as well.   I am happy happy happy!    Next time I will try to frame the collages......little steps.

I am going away next weekend on and extended visit to the wallabies and birds, and will be back in the new year.   I will still be able to receive comments through my phone.

A very merry Christmas and a Happy and prosperous New Year to all my friends and followers for 2013.  See you all in January.


24 November 2012

More Gimp lessons


Week 3 has been a real learning curve....we are really getting into the nitty gritty now.   After starting the first part of the lesson I almost threw in the towel, but today have persevered with it.

We are still working through the tools, but have worked a little more with them and added, the colour picker, scissors, scale and sheer tools and the eraser

We also learned how to use some of the filters, artistic, and edge detect.

I am having a lot of fun playing with all the elements of the lessons.  Hope I can remember them.....but there are always the worksheets to go back to.
artistic/cartoon
Edge detect/edge

 Wish we could have as comprehensive workshop in arranging photos with blogger,


21 November 2012

Gimp Class -

Warning, long post with pretty pictures coming up.

For those who do not know, Gimp is an open source (free) photo editing programme.   I have had it for some time now, but after an earlier try at learning it, gave up and have mainly  been using it for cropping and scaling photos.  For some time I have wanted to take Sharon's Class.

When I saw the size of the first lesson I thought I would never get through it, but those 41 pages were so full of information and is so interesting it makes me want to just keep going.  By the time I revised lesson 1 and got to lesson 2 I found myself clapping my hands every time I got something right.....even if I had been over and over it 20 times without success.
Now I am loving it and cant wait for Thursdays when the next lesson comes out.

I am very fortunate that when I made a foray into Gimp some time ago, it was set up for me by my big son, who is in the IT business, and subsequently tweeked by my darling Anthony who lives locally and who is amazing when it comes to fixing computers.

For a time before I moved here I belonged to a computer group, and gained a lot of knowledge from those members as well.     So I consider myself fortunate that I am able to have this programme set up without having any problems.

We went through the basic cropping, colouring exercises before getting down to some creative stuff 
 I achieved a couple of results I like with very simple colour manipulation. 
Then we went on with some more really clever stuff. (well to me is is brilliantly clever)
Misty and Nana

Brad, me and Nath
I made two nice photos of me with grandchildren.
Then we went onto cutting and pasting.   Something I learned from this was that I can do it better, but these are the lesson photographs.
Dad on a fishing trip
With the photo above of my Dad I took a pic of one of my reef paintings and was able to copy and past the photo of Dad plus cut out bits around his picture as well.   (Great clapping of hands when I did this)
Mum as a little girl
The little girl is my mother dressed in her finery.  It was an old black and white photo which I was able to use the lasso tool to remove her image (a huge feat with my shaky hands) and impost it onto a piece of my embroidery.  

I did have problems with the photo could not get it to colour and that is when I discovered  what my problems were ....(a) I was not focusing on what I was reading (b) I was not reading every line, but glossing over bits which always turned out to be the important bits. Changed the old photo to RGB and it worked.  (more great clapping of hands for myself)

Then we got to frames and gradients and I really realised the importance of "layers".  We made some notepaper, andhere I made a collage of the four pages I did.
collage of my notepaper pages
The final part of the lesson was a challenge to go through the various elements, take some pictures and work with them and design a quilt.  Not being a quilter my efforts at that were not good, but I worked on the principal of working with shapes.   Although I am convinced that damn lasso is like fly paper ....sticks to the curser and wont go away until you click on something else.

Here my quilt designs......not perfect but I still gave myself lots of clapping of hands. Learned a lot about "layers" with this and also that you must name each layer as you go. 

My earlier efforts with this programme are on my other blog here


18 November 2012

Back from the Wedding.

Am back home again, and boy is it good to be back .   I really value the little unit I call home after all the travelling about during the year.

Dont have any good photos of the bride and groom yet, am waiting for DIL to send me a disk of photos from her super dupa  camera.   I am such an amateur when it comes to photography.


The wedding was a lot of fun, and there were quite a few tears of happiness shed for Brent and Claire.  

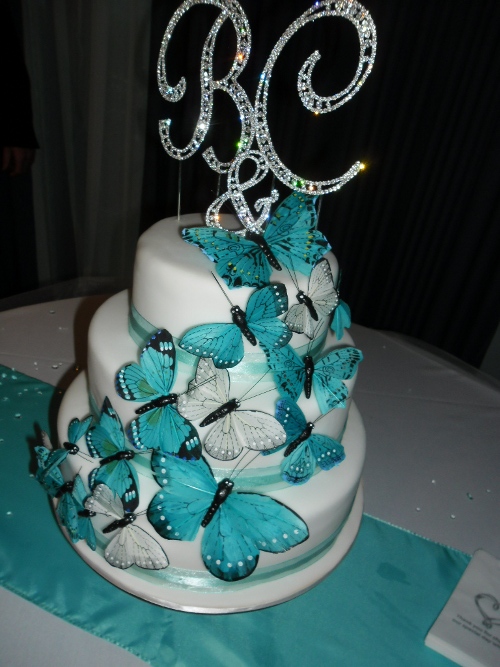
After the ceremony everyone released their butterfly which came in a little packet.  The children were fascinated with them.

 
I discovered that I am getting a new great grandchild in February, so had to have a photo with the mum and baby.
Havent seen these two grandsons for a while, and they always seem to be getting taller....or am I getting shorter.


No event in my life would be complete without some sort of mishap and this was no exception.   Remember those blingy shoes....well even though I wore them round the house beforehand to get used to them, after 10 minutes they had to come off and that was before I left for the wedding.....my feet were already killing me in them. 

Then when I got dressed, I said to everyone..."gee I must have been fat when I bought this outfit this skirt is pretty big...hope it doesn't fall down"  This of course sent the groom and his mates into hysterics and lots of teasing.  Then after they left daughter and I were putting the finishing touches to our hair and faces, and would you believe it.......the skirt fell down!!!!! the elastic just broke!!!!  I have only worn it once before to the Dunk Island wedding of my eldest son....nothing is made to last these days.

Panic all round but no where could we find a needle and thread so the only option was to tuck the top of the skirt into the top of my stepins and hope to goodness that it held......which it did by the way.....they were pretty tight too!

We did manage to get to the venue before the bride thank goodness.

I am now concentrating on my Gimp course and loving every bit of it.  Just a few problems focusing my brain.    Will have to stop myself from only half reading the lesson and I might get somewhere.   ha ha. 

Can hear the thunder of an impending storm so time to batten down the hatches.


08 November 2012

All Glammed Up for Melbourne Cup Day

Just a quick post before I take off for the Wedding.   Tuesday was the day of Australia's famous horse race, The Melbourne Cup.   It is a tradition for lots of MC parties to be held, and the quilt group was no exception.


We had a great Day, lovely friends, yummy  food.   Didn't win any of the sweeps...my nags are still running I think.  Even wore a hat. Sorry the photo is not very clear.   I was told later that my fascinator should have been worn on the other side.   Had to crop the photo because I was standing with my legs askew and it looked very unelegant......good for a laugh though. Wish I had remembered to take my camera.....

Had a lovely surprise on Sunday, Rach and Paul and the boys called in on their way up for her brothers wedding on Saturday.   The boys were so funny, but in my excitement forgot to take photo. Might have to begin wearing my camera round my neck.

Their mother Kim informed me today that the other brother, Tom has been diagnosed with a huge clot in his leg from his calf to above his knee.    Might have to give him a  "nana lecture" about listening to the Doctor's instructions and adhering to them.

Am almost packed.  The only trouble with being organised is that I end up with lots of spare time!

Will be able to study the first Gimp class tomorrow, and maybe get something done before I leave.


26 October 2012

and I went shopping.....and stitched!

Remember those shoes that I threw in the bin in Melbourne, the ones that gave up the ghost after 25 years.....well I went shopping and bought a pair to last me for the next 25 years.

I'm going a bit tarty in my old age with all this bling. Well when we get old we have to replace what we lose with something eh.  Here's hoping that I don't topple off those heels.

I have been thinking of practising some "Gangnam" style dancing for the wedding, but not sure whether those heels would be suitable.   Just might have to kick them off.....old ex ex  husband won't be at this one so I can have a good time!

My outfit is one I wore to the Dunk Island wedding and it has some bling too.  Photos will be seen after the wedding.  


AND  I HAVE been stitching in between doing other stuff like getting rid of all the grot I had allowed to accumulate since returning home.   It gave me a good feeling to have my unit all neat and tidy and clean again.  I felt very rightious but the truth is my friend Di was coming for a sewing day so my guilt got the better of me.

I even sat for hours winding off all the scattered mess of threads sitting on my table so I could have a little skite, and create an impression of being a bit of a neat freak.

Firstly I managed to finish the Bonnet stitch for Tast.   Added just a couple of cast on buttonholes, and a couple of pistil stitches, and one cup stitch which now leaves me almost up to date.
I think if you click on the photo you will be able to see it larger, and if not, when you click on it and get the new one up hold down the ctrl key and scroll with the mouse wheel to make the photo larger.

The lovely piece of tatting on the bottom was a gift in a bag of tatting pieces from my friend Sue of Suztats.   I have been holding on to these, and this embroidery  was the perfect place to use it.

The next piece of embroidery is for a bag I am making.    First I painted the design using my inktense blocks. Because it turned out a bit dark I rinsed out some of the colour then ironed it dry to set the colour.  I have embroidered over the design, and added some beads.   I have cut out some nice blue waterwave taffeta to line it with, and when it is sewn up I will add some buttonhole keepers for the drawstring........will post a photo of the finished project when it is done

It was really satisfying to finish these two projects as they have been sitting round for ages.   All I have to do now is to get on the sewing machine and complete the bag and I can move on to more things that need to be done.

So there it is not one post, but two.....gradually catching up.